
.
UPDATE 1: This product is totally SOLD OUT!
If you want to try to DIY there are links below for all the hardware and the electronics.
UPDATE 2: I have since moved on to using a different solution for using the last bit of filament on the roll. You can read about the “LOW FILAMENT ALARM HERE“
.
This page about building the “Filament Fuser Block” as seen on 3DPrinting.com here. The finished device can be used to fuse together two ends of FDM 3D printing filament, any size and any material!
The associated 3D Printable files are available for FREE on Thingiverse.com here.
PLEASE BE AWARE: This device is designed & intended to be controlled by your existing 3d printer controller. This is super easy to do on a reprap printer, but may be difficult for some commercial devices. If you need a stand-alone controller, my recommended solution is to get the cheap complete reprap ramps kit and just use it for this purpose. (After you get it setup you won’t even need to connect it to your computer) Control kit available here and a power supply for it here.
.
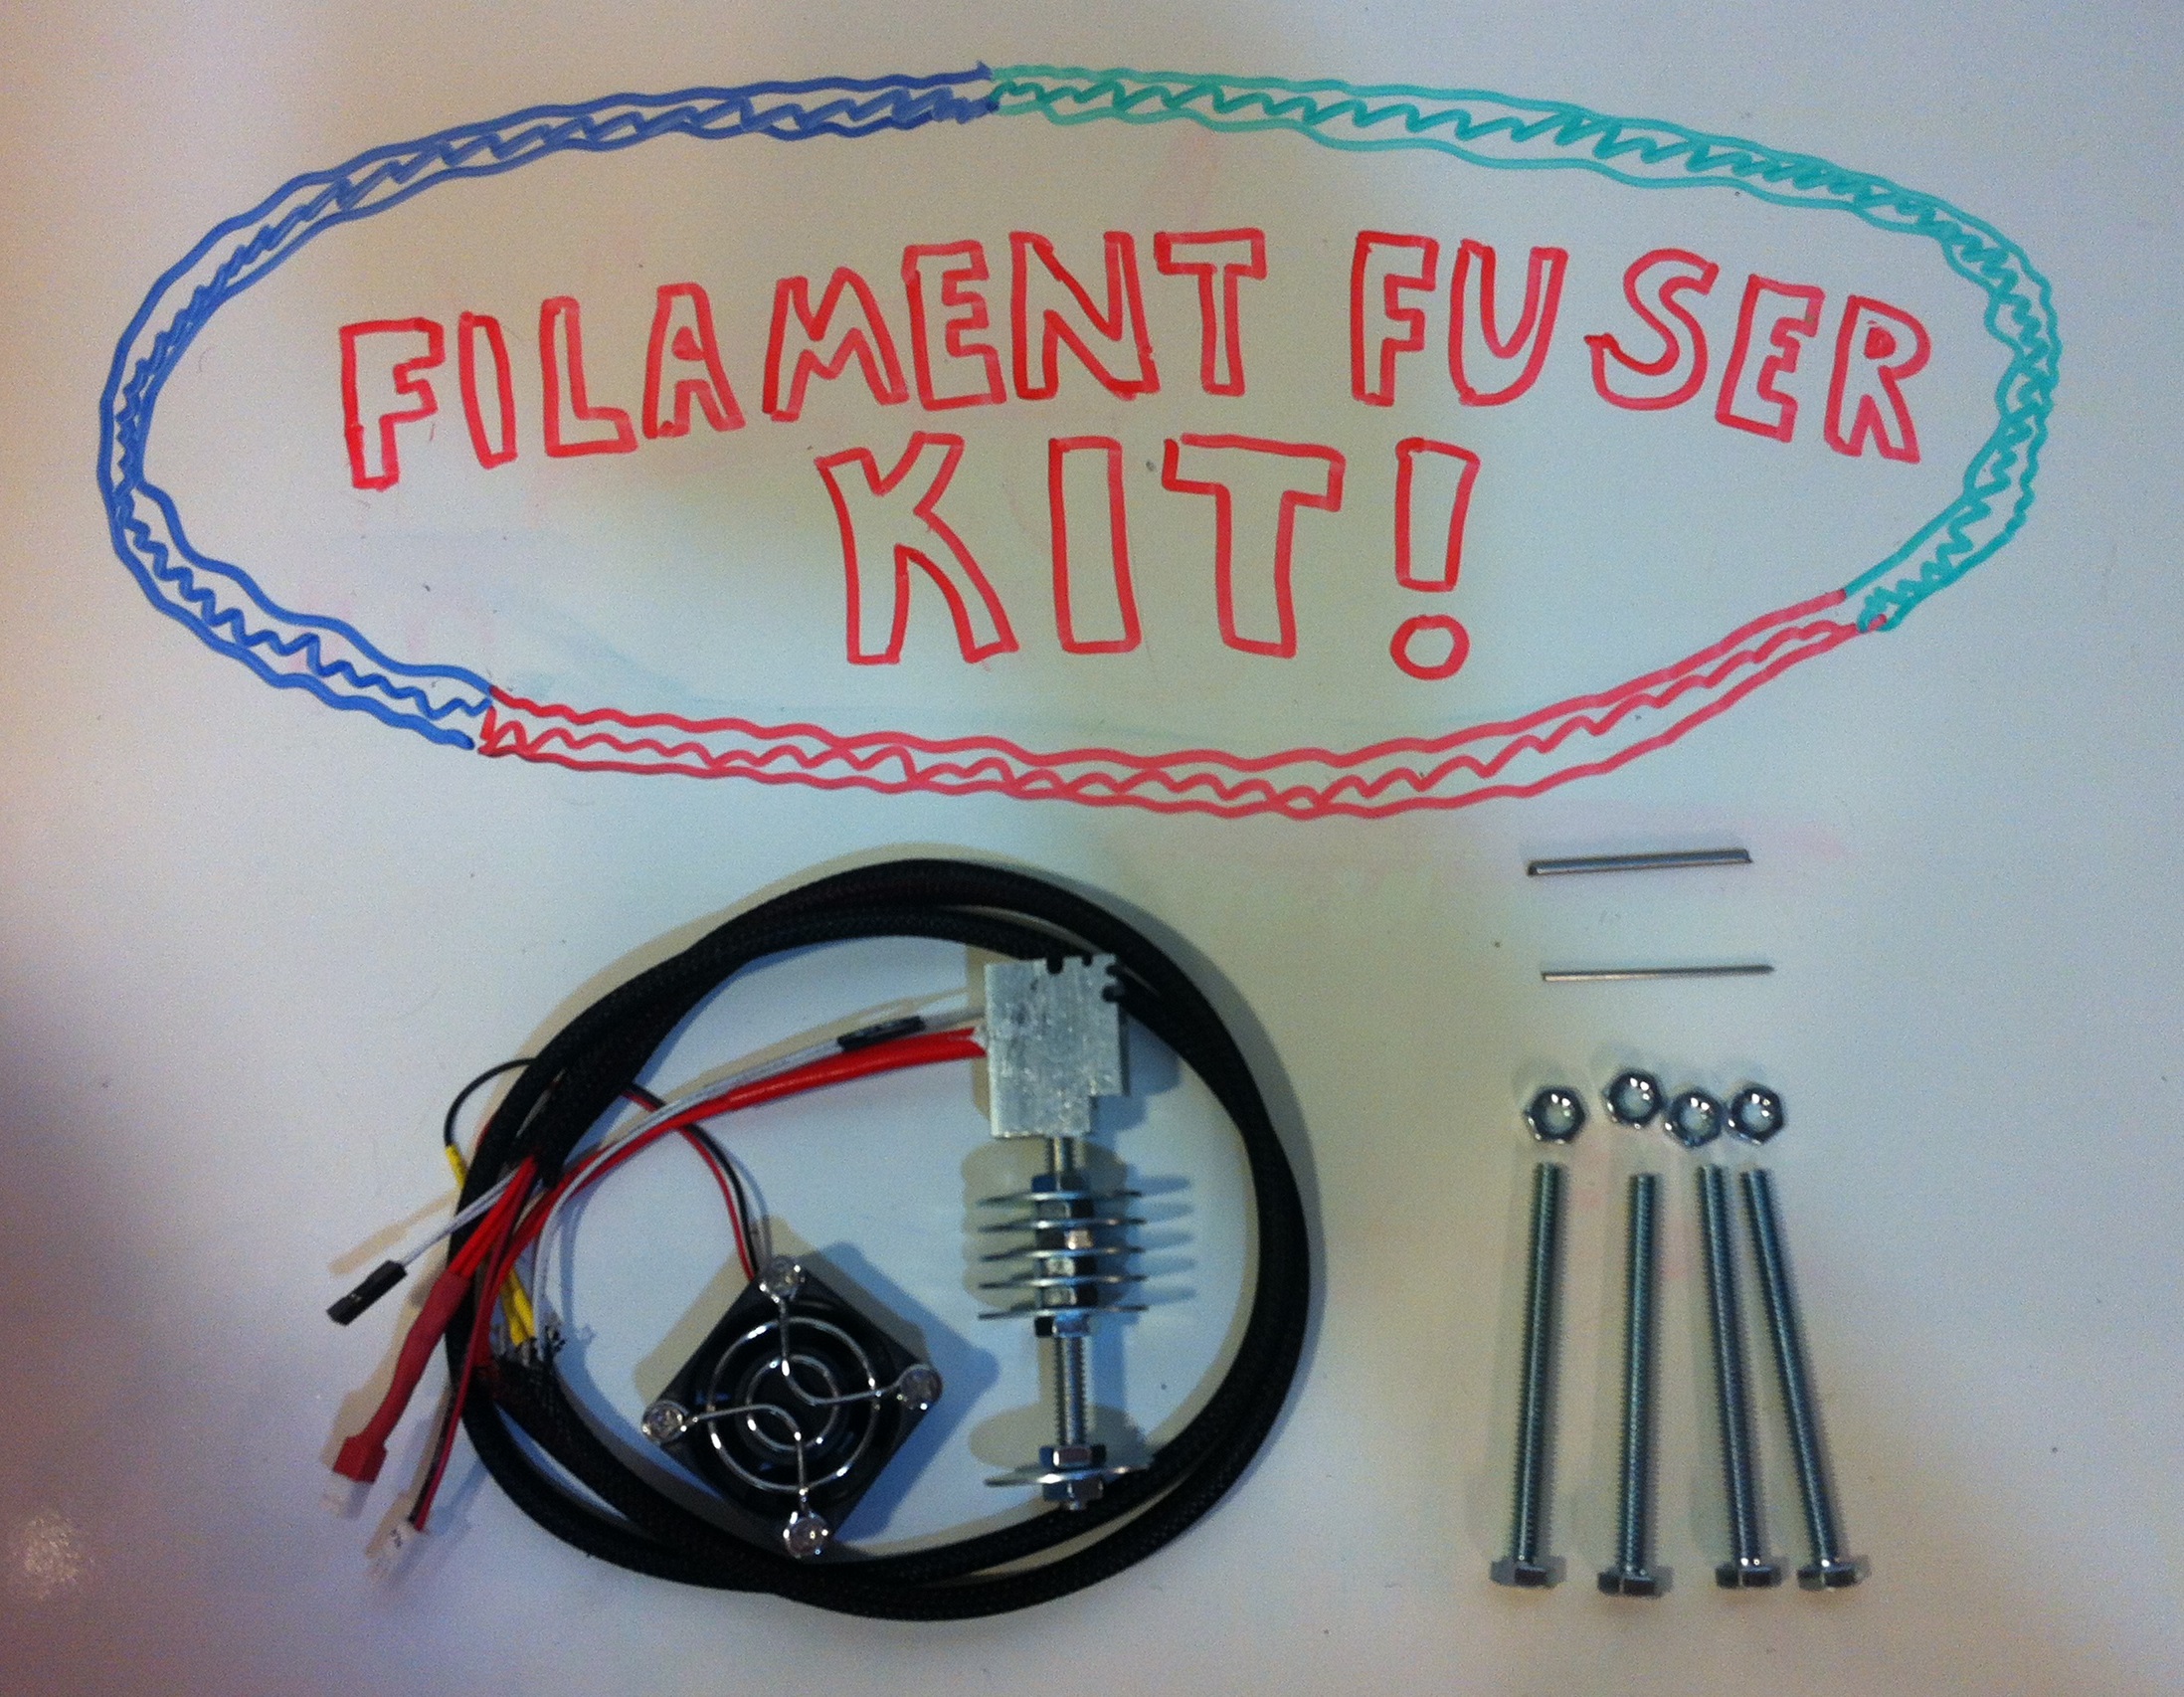
| PACKING LIST | |
| ITEM | QTY |
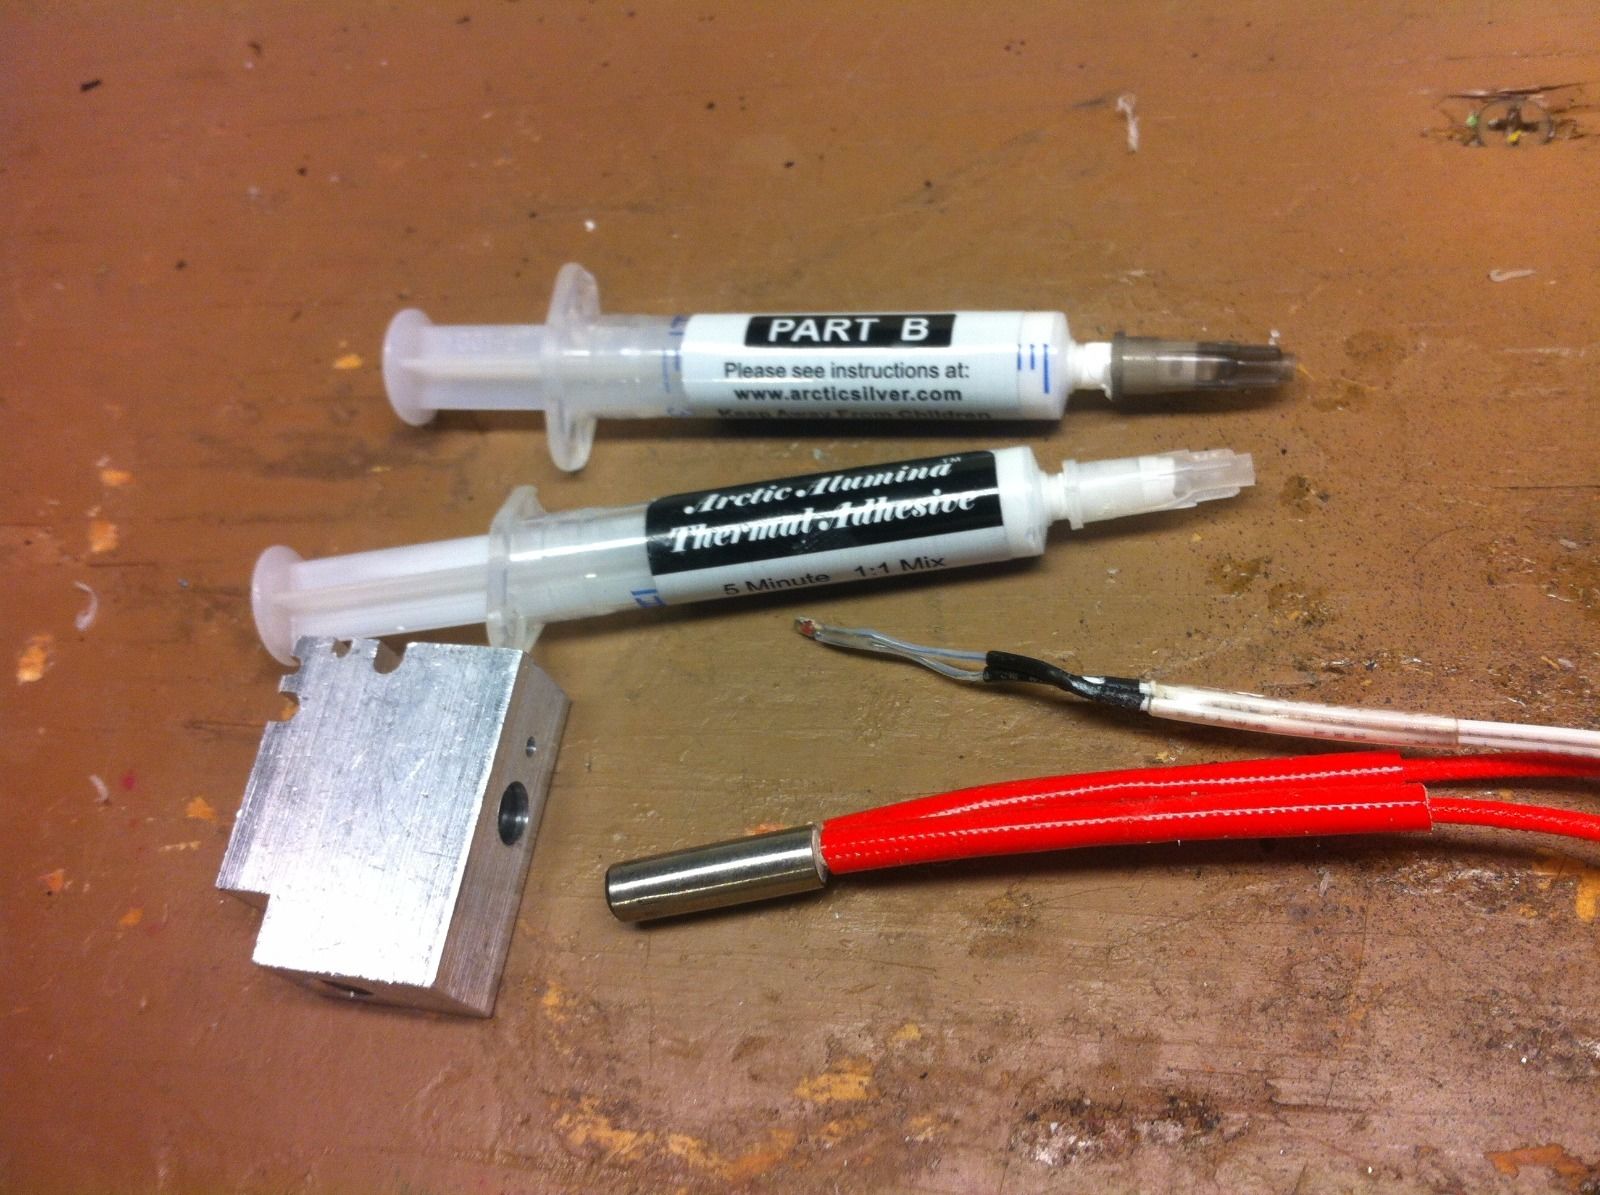
| Assembled: Machined aluminum heater block, heatsink, Fan, heater, thermocouple, wiring, 2 pin connectors | 1 |
| Steel Bolts | 4 |
| Steel Nuts | 4 |
| Steel Rod 3mm | 1 |
| Steel Rod 1.75mm | 1 |
.
| DIY Non-Printed Parts List | ||
| What | QTY (ea or Inches) | Where |
| Wire Harness | 36″ | http://www.mcmaster.com/#2837K22 |
| electrical wire, 36″ x 2 for fan | 72″ | http://www.mcmaster.com/#8260T11 |
| 2 wire pin connector | 2 | Not sure where to get online |
| fan | 1 | http://amzn.to/2lRQLpp |
| heater | 1 | http://amzn.to/2lRBuFd |
| bolts 3″ | 4 | http://www.mcmaster.com/#91309A554 |
| Threaded rod 3″ x 1/4″-20 | 1 | http://www.mcmaster.com/#95475A554 |
| Jam nuts, 1/4″-20 | 13 | http://www.mcmaster.com/#94846A029 |
| Fender washers, 1/4″ | 6 | http://www.mcmaster.com/#91090A109 |
| thermocouple + wire+pins | 1 | http://amzn.to/2njX4Pu |
| thermal glue | 1 | http://amzn.to/2nk1KoQ |
| Drill Rod 3mm, by X” | 1.75″ | http://www.mcmaster.com/#88625K62 |
| Drill Rod 1.5mm by X” | 1.75″ | http://www.mcmaster.com/#8893K119 |
| Aluminum Block 0.5″x1″ by X” | 1.25″ | http://www.mcmaster.com/#8975K11 |
| Heatshrink | 1 | http://amzn.to/2njU05V |
2D Drawing for the machined block: https://engineerdog.com/machine_heater_metal/
.
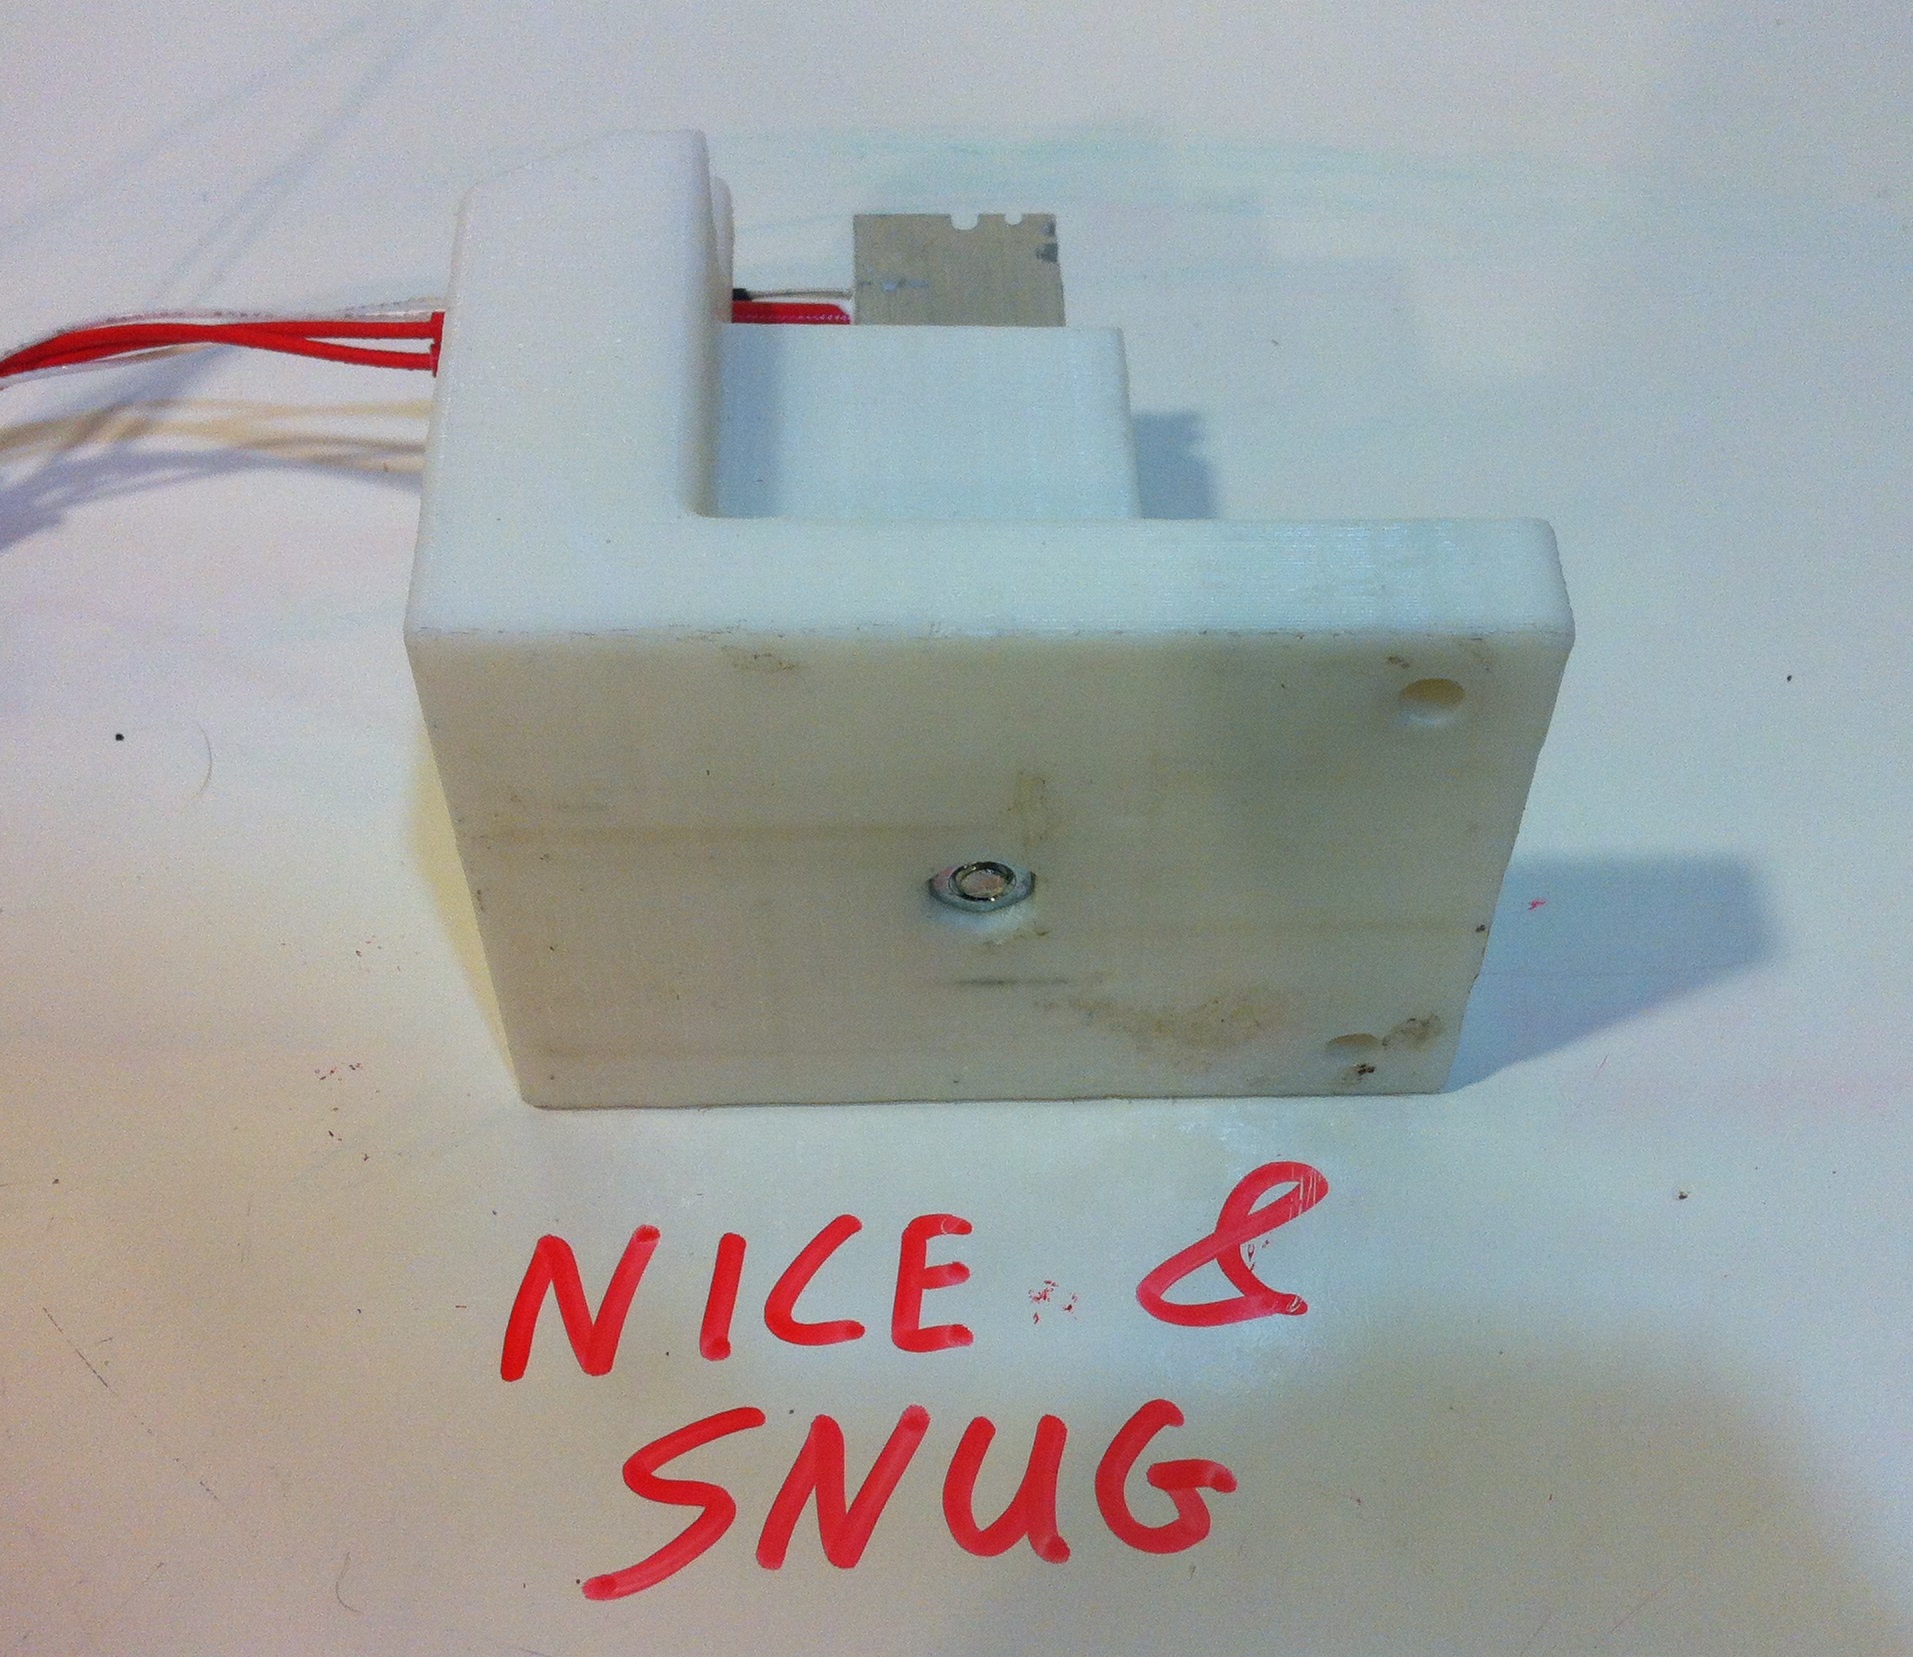
Assembly Instructions :

(Above two steps are already take care of for you, shown for reference. Print out the 3D printed parts and proceed below)


How to fuse filament:
The secret to getting a good bond is a combination of good tool and the right technique. First warm up your Block by plugging it into your 3D printer controller. Just borrow the same set of pins that your extruder uses.
Then take about 1” of filament in each hand and follow this quick procedure.
- Push the filament into the side of the block for a couple seconds until it starts to mushroom out. (so you know it’s hot)
- Push the separate pieces together using the top groove as a guide.
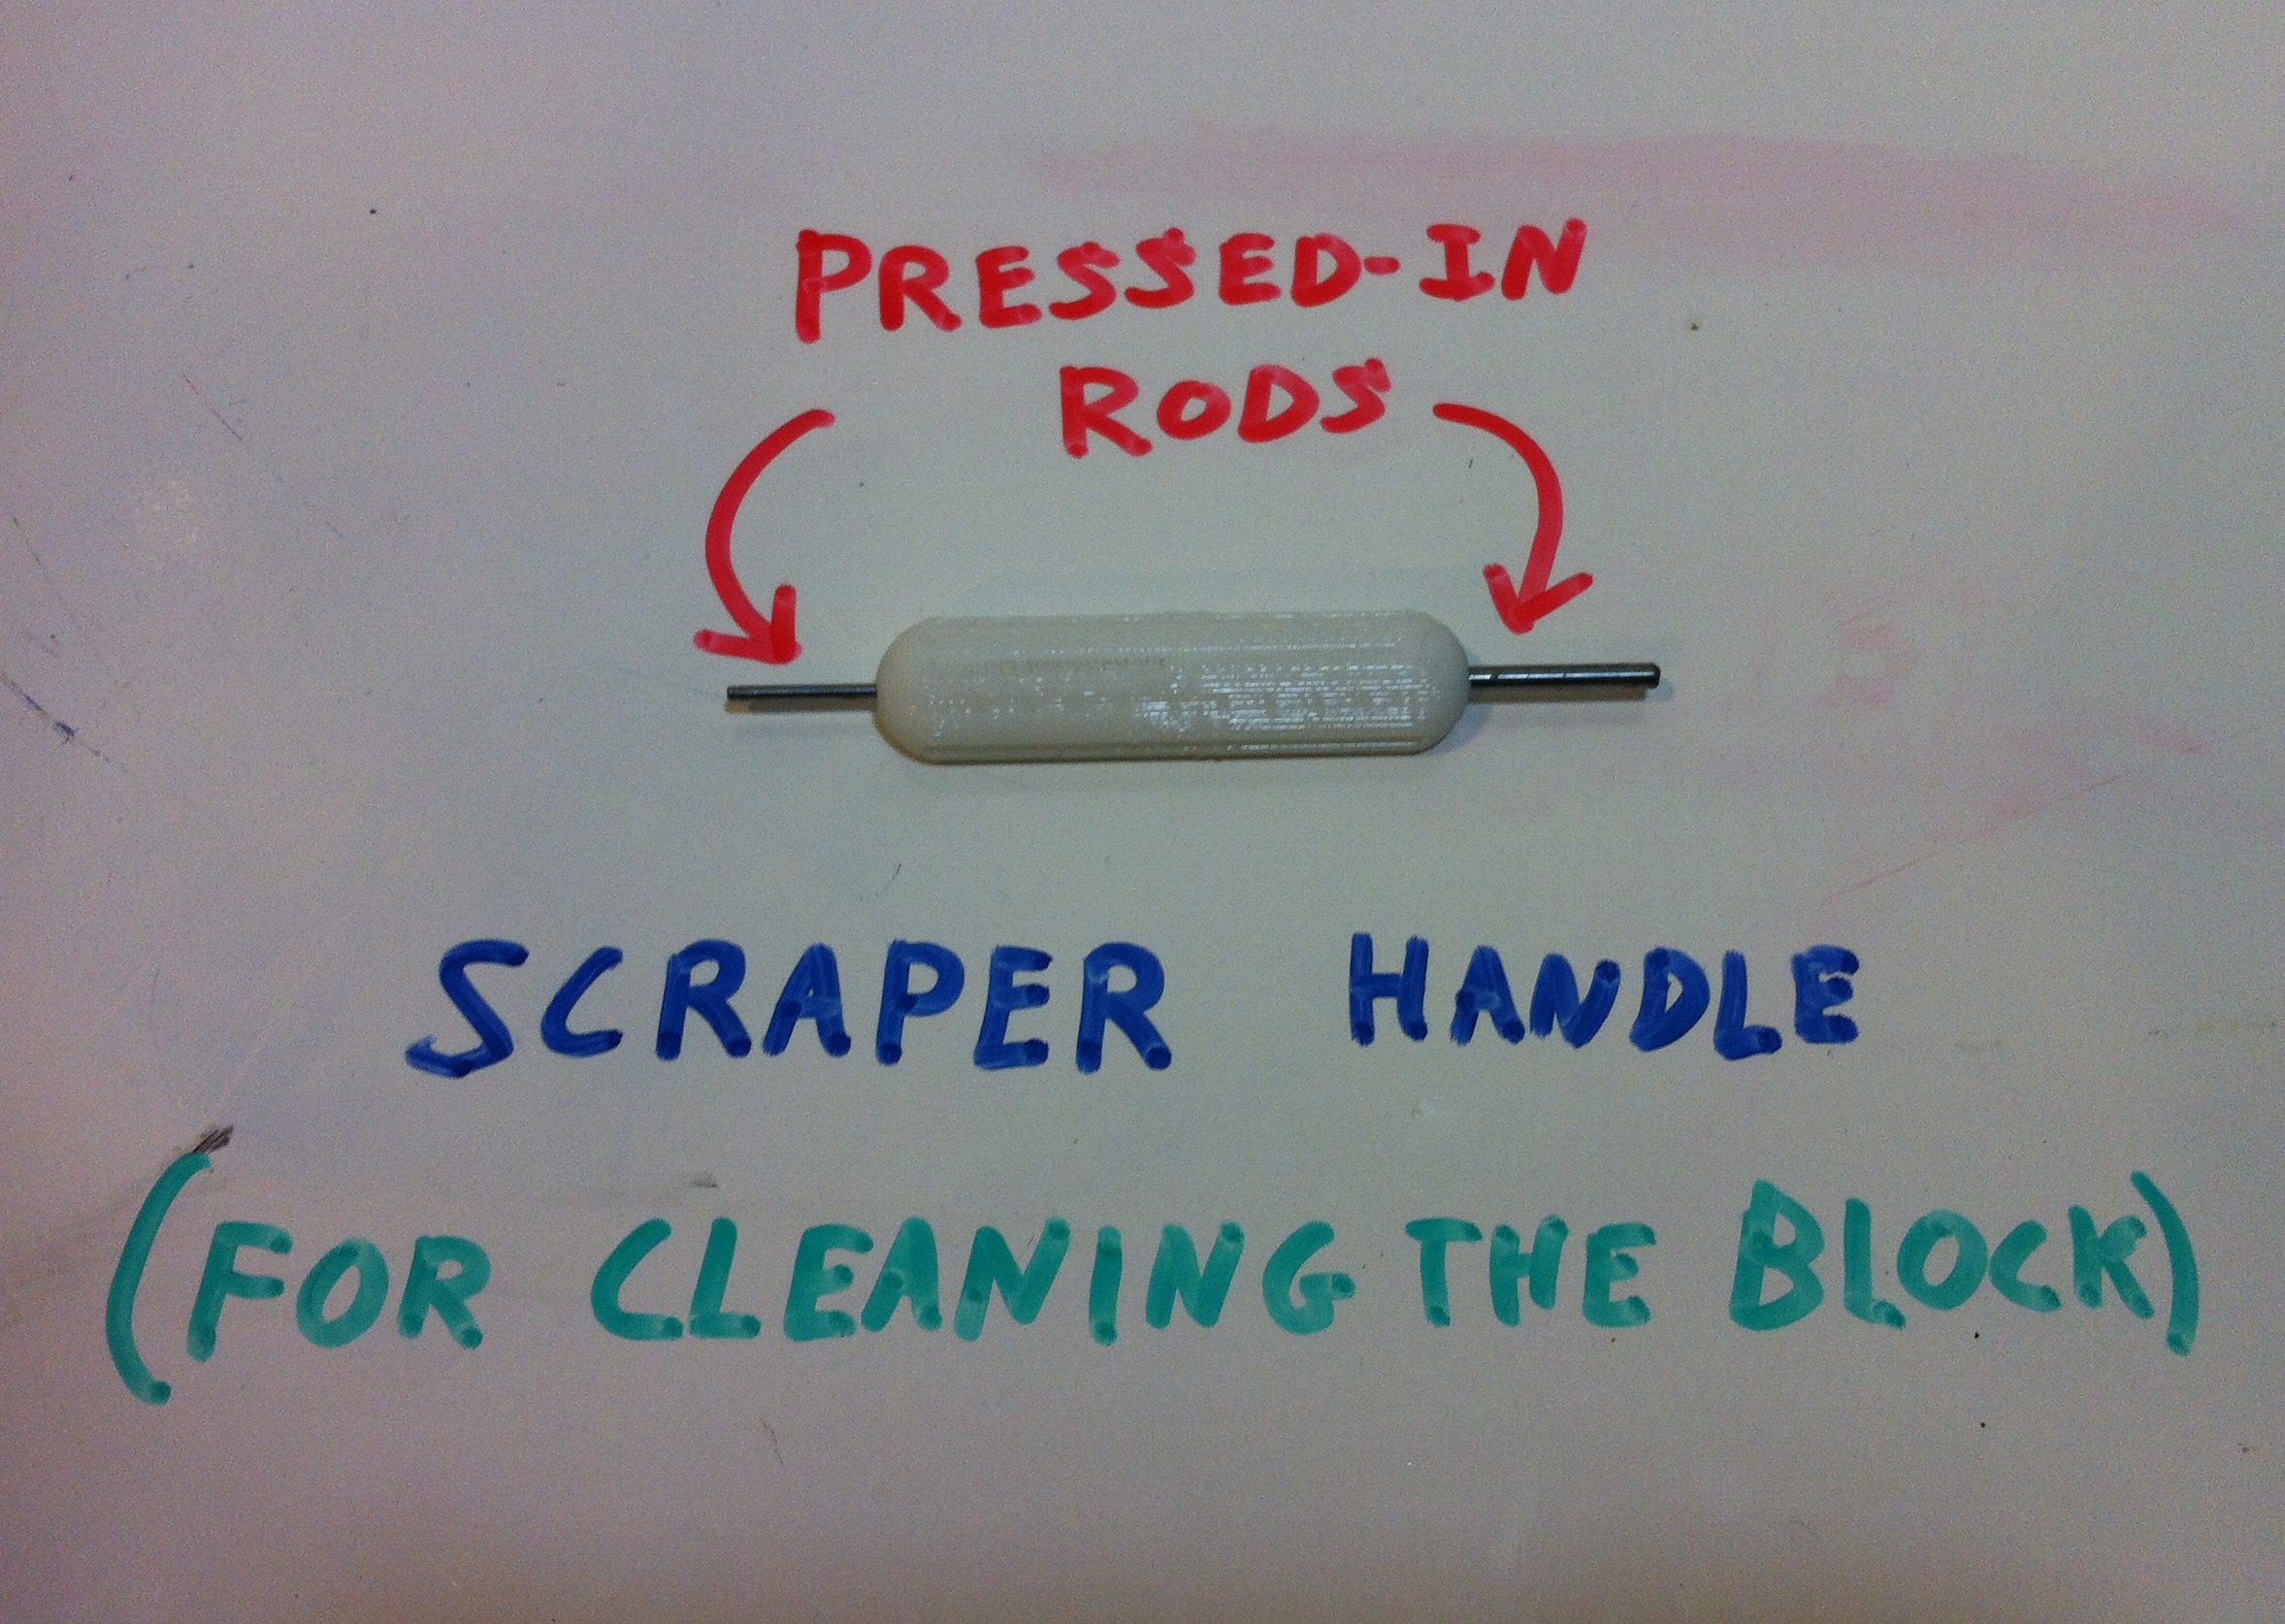
- Slide the fused filament from the guide so that you scrape off the mushroomed material, leaving a smooth side.
- Side the fused filament through the side groove to remove the rest of the mushroom.
- Hold the bond in front of the fan until it cools.
- If necessary use the various edges of the block to scrape off any excess material or re-smooth the bond.
Let your slicing software to tell you how much filament the print needs and divide that length into segments to choose where certain colors will show up.


Relevant Video Support/Demonstations:
Questions or feedback? Leave a comment below!

Hello! Would you be able to post the parts/materials used in the heating block? I’m trying to make a similar heating block myself.
LikeLike
Hi sorry for the delay, but its done! https://engineerdog.com/store/filament-fuser/
LikeLike
Awesome! Thank you very much.
Another request: Where can I find instructions on how to control the heater/thermistor using my printer’s control board? I use a Printrbot Simple Metal.
LikeLike
The whole procedure is to trace the wires coming from your extruder to see where they connect to the printer board, then plug the fuser block into theose conectors. Thats the heater, fan, and thermistor.
Then on your computer you control the fuser via the extruder controls.
LikeLike
Thanks for all your work! I can’t figure it out how I can buy the aluminum heater block from you and how much it is delivered. I am in Florida. Thanks for your help.
LikeLike
Still have any machined blocks and parts baggies around? If so, I’ll take one…
LikeLike
HI Kyle, at this point I dont have any order links on the product page as I am moving everything to a new storefront and focusing all my efforts on my new robot kits. For the
fusers all I have left are the blocks by themselves now. $10 Ea + $3 shipping anywhere in continental US. If you want, pm me your shipping address and I can send you an invoice and get it out within a day or so.
LikeLike
I’d be interested in purchasing one of your finished heater blocks if you still have any left.
LikeLike
Hi Alex,
Do you have any finished filament block ready for sale. Please let me know as I am interested in one.
Thanks,
Sachin
LikeLike
I know it’s been awhile but do you have any fusser blocks left? I would be very much interested in purchasing one if you have them.
LikeLike
HI Greg, sorry all gone!
LikeLike
Were did you get the filiment blocks used in this product?
LikeLike
The raw material came from a local suppler, ‘Metal Supermarkets.’ But I shared on this page a link to the 2D Drawing for the machined block
LikeLike
What about a drawing of the heatsink like the one you did for the heat block
LikeLike
The heatsink is just a stack of 1/4″ fender washers and 1/4″ jam nuts 😉
LikeLike