
*What is TestrBot? (Update: Link to instructions here)
TestrBot is a $300 Universal Test Machine that can be used to perform any type of static or dynamic testing in tension or compression up to 200 lbs! It was designed to allow me to run a batch of physical tests on 3D printed specimens at home.
.
*So what can be done with data collected from TestrBot, anyway?
TestrBot only directly measures two things, force and displacement, but we can learn a lot with just those two pieces of information. The graph below was generated using the data collected from the test shown in the video.
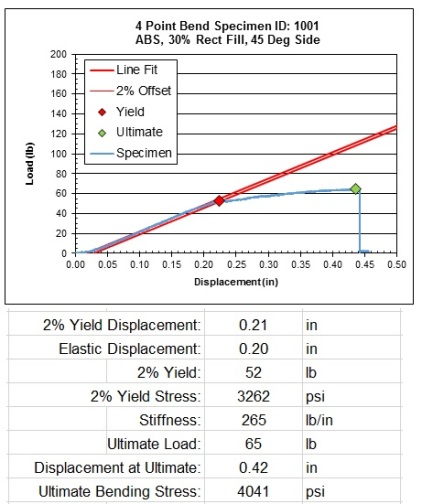
I estimated that the specimen would yield at 58 lbs (3300 psi) but hitting that exact number wasn’t the goal of this test. At this point all I have proven is that I am either good at math or lucky at guessing numbers. (Honestly, I was shocked how close that was though.) The really interesting stuff is yet to come when I print out a lot more specimens that are slightly different from the first so I can isolate the effect of individual variables. At that point having a graph and the above data will make the effects of minor design changes very clear.
.
*How accurate is the data collected?
The displacement measurement resolution is insane. TestrBot can measure distance increments of .00014” or about 1/28th the thickness of a sheet of paper.
The force readings are respectable but still a bit limited due to the 10 bit Arduino. The smallest force it can measure is 0.195 lbs. Still that was small enough to produce that sexy smooth graph above.
.
*How do I know the measurements are correct?
Oh boy, that simple sounding question opens the door to a very long conversation involving traceability, calibrations, and what exactly determines how much a pound weights. It will have to suffice for now to say that all the data readings from TestrBot are repeatable. TestrBot’s force readings are consistent no matter what it thinks a pound is exactly. For what its worth, TestrBot’s load cell is in agreement with the weights at my gym.
Being precise is important because it means that even without official traceability the data produced can still be used for comparative testing, which is all I need it for.
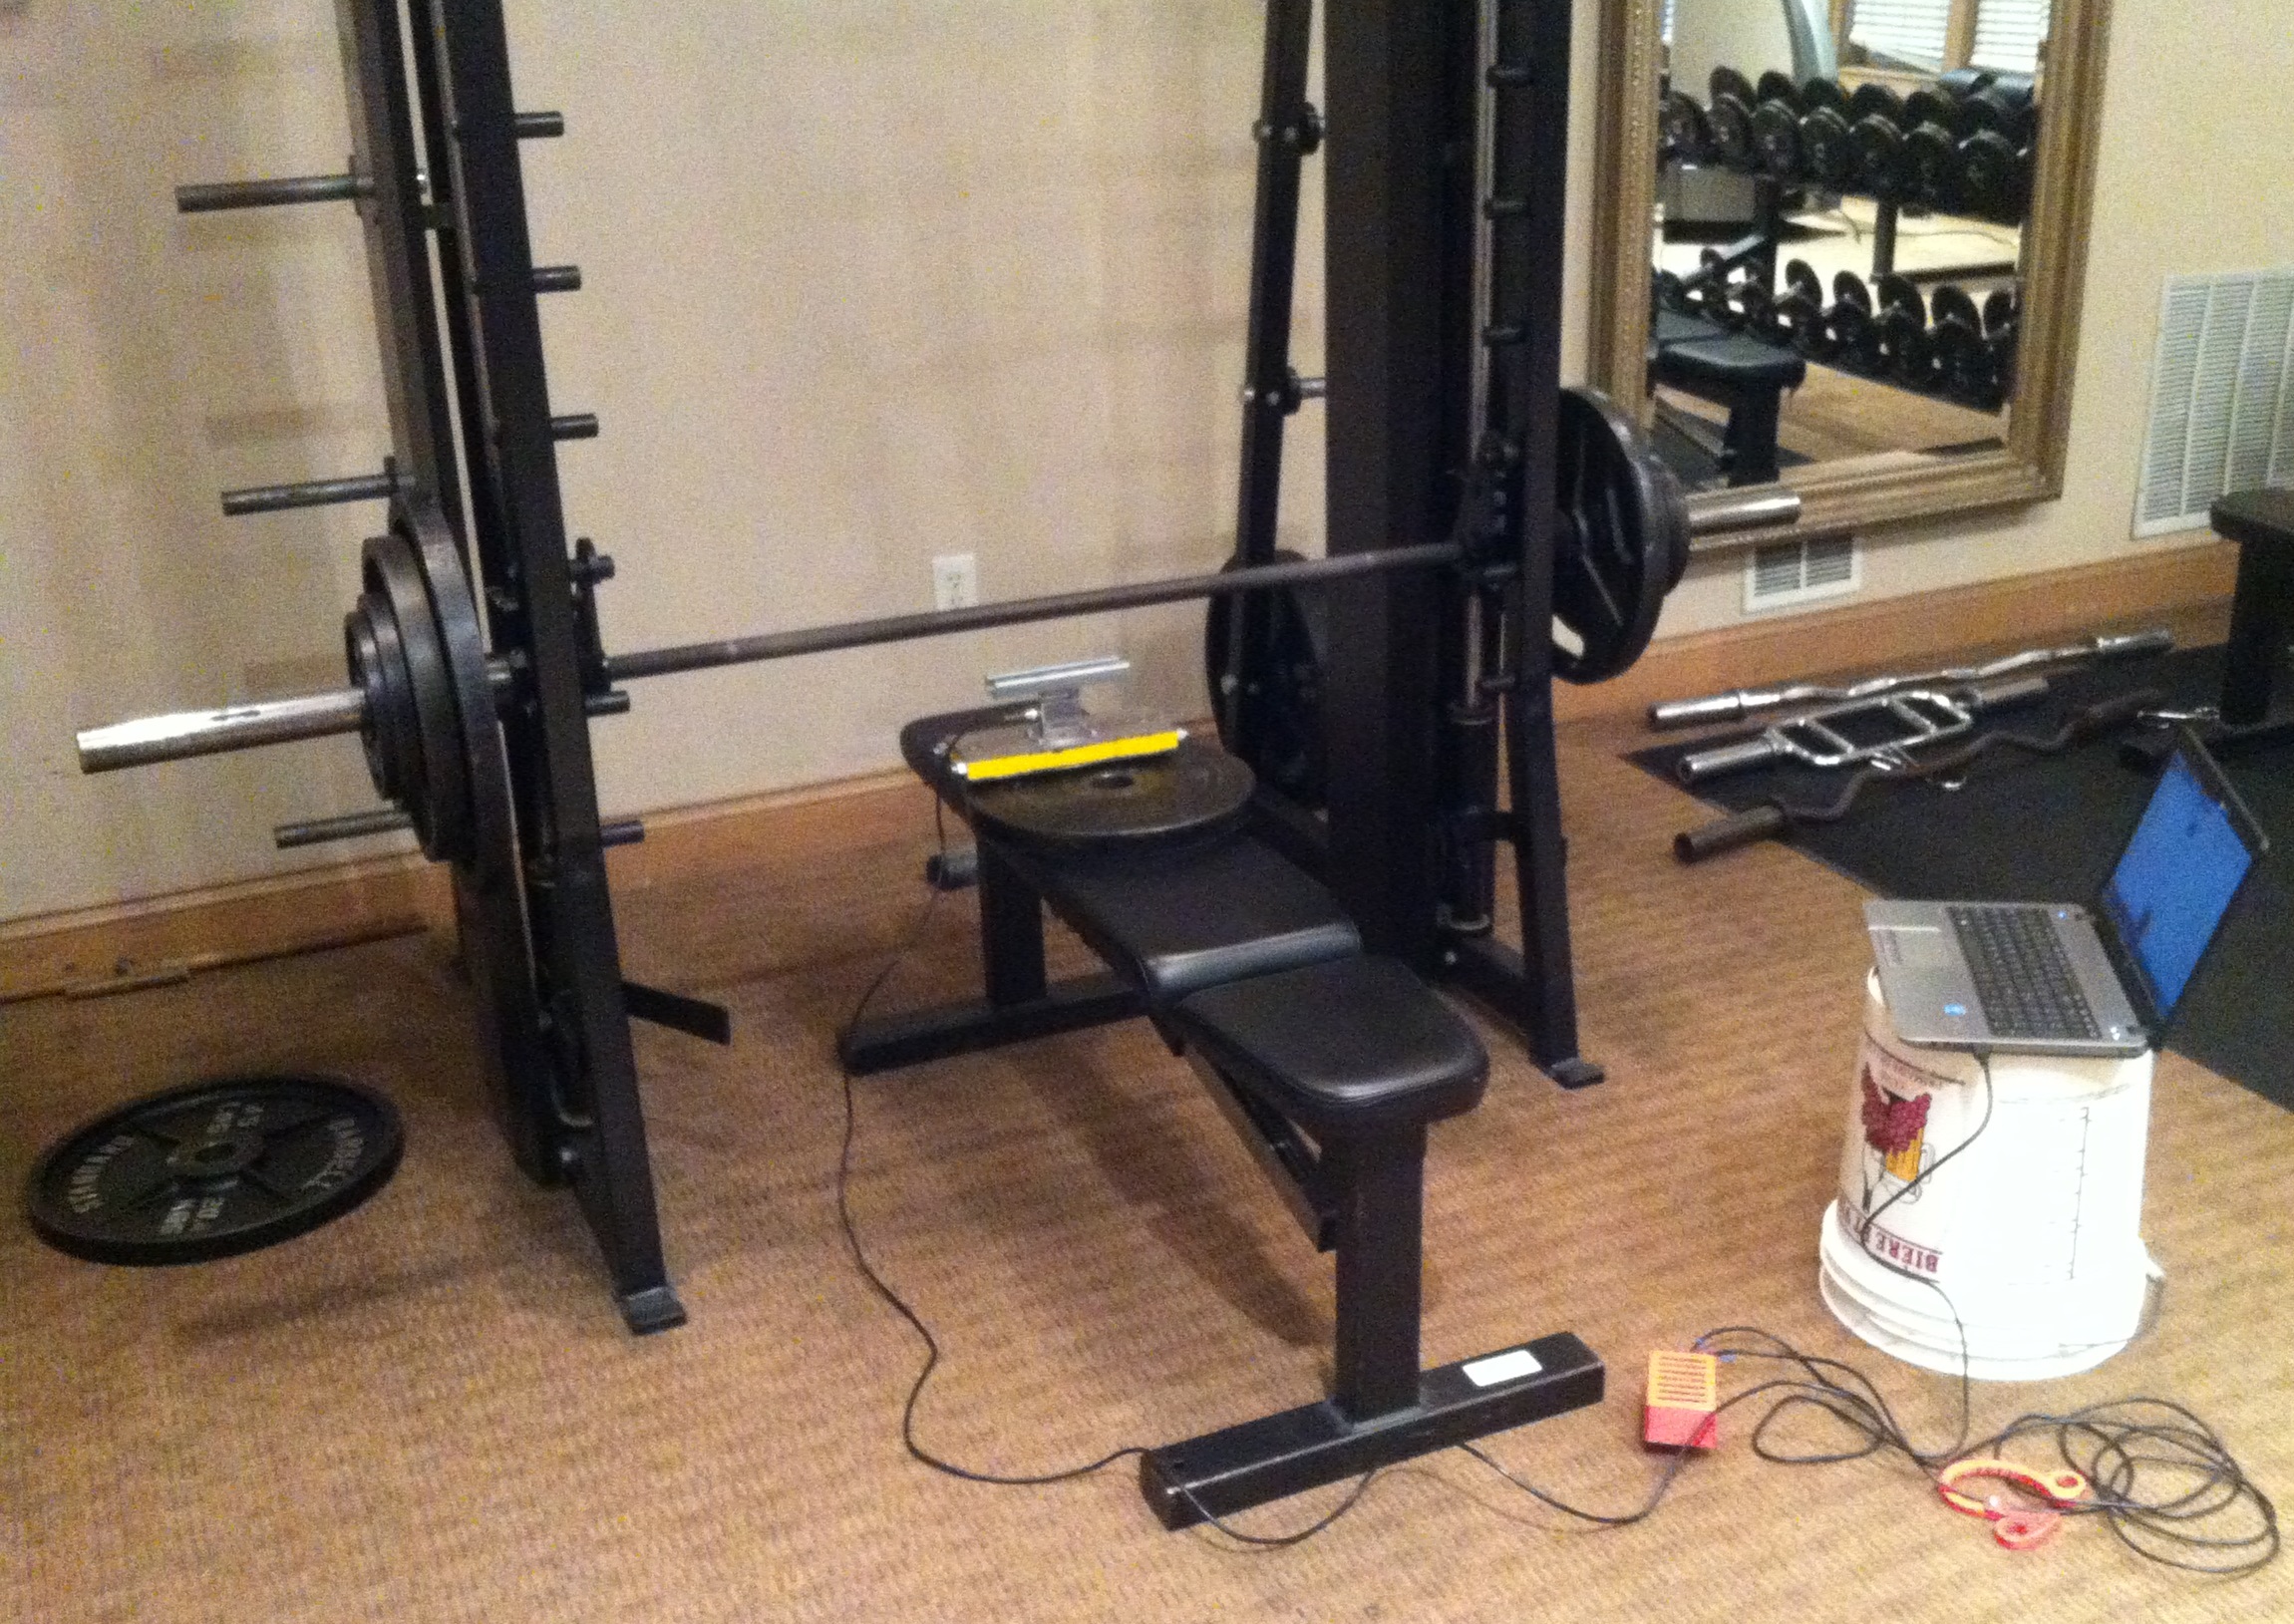
I don’t always do 120 consecutive dead lifts, but when I do it’s because I’m the nerdiest guy in the room.
*Is $300 a good price for a universal test machine?
Absolutely, especially considering that almost 50% of its total cost went to the load cell alone. Low end professional UTM’s cost of thousands of dollars and the sky is the limit on good ones. This little machine quite capable for its price. It can be used for any type of displacement controlled static tensile or compression testing with the program I wrote. With a bit of tweaking on the program it could even be used to do force controlled fatigue testing (albeit at a slow rate). Those things combined with the versatility of the built in unistrut rails justify the “universal” part of the name.
.
*What else makes it special?
TestrBot is explicitly designed to be replicable. Whenever possible I used 3D printed parts, things available from the hardware store, and failing that from Amazon or Sparkfun. I’ve created a detailed set of build instructions and shared them on Instructables.com. The bonus is that there happens to be a directly applicable contest going on right now: ‘The 3D Printing Contest.’
Looking forward, the first test on the list is ‘Infill Orientation’. I want to determine effect that infill orientation (i.e. direction & angle) has on the strength of the finished part.
What do you think? Which of the common printing infills will be the weakest when loaded off-axis? Which direction IS off axis anyway?

I have check out your work and specifically about TestrBot, the Universal Test Machine. I have to say that your work is great!
I have a Project to do for my University the same as TestrBot and I’d like to sent me your designs to file on solid Works like .prt .sldpart, if you can of course. But I don’t want to sent me .stl file.
My adreess is : marakipeh@gmail.com
Thank you.
LikeLike
Thanks you a lot! Your Project and work seem excellent. I will study these files.
Thank you from my heart for all these files.
LikeLike
[…] the moment I’m designing a custom universal test machine that I can use for mechanical testing on 3D printed objects. I’ve seen a few other folks perform […]
LikeLike
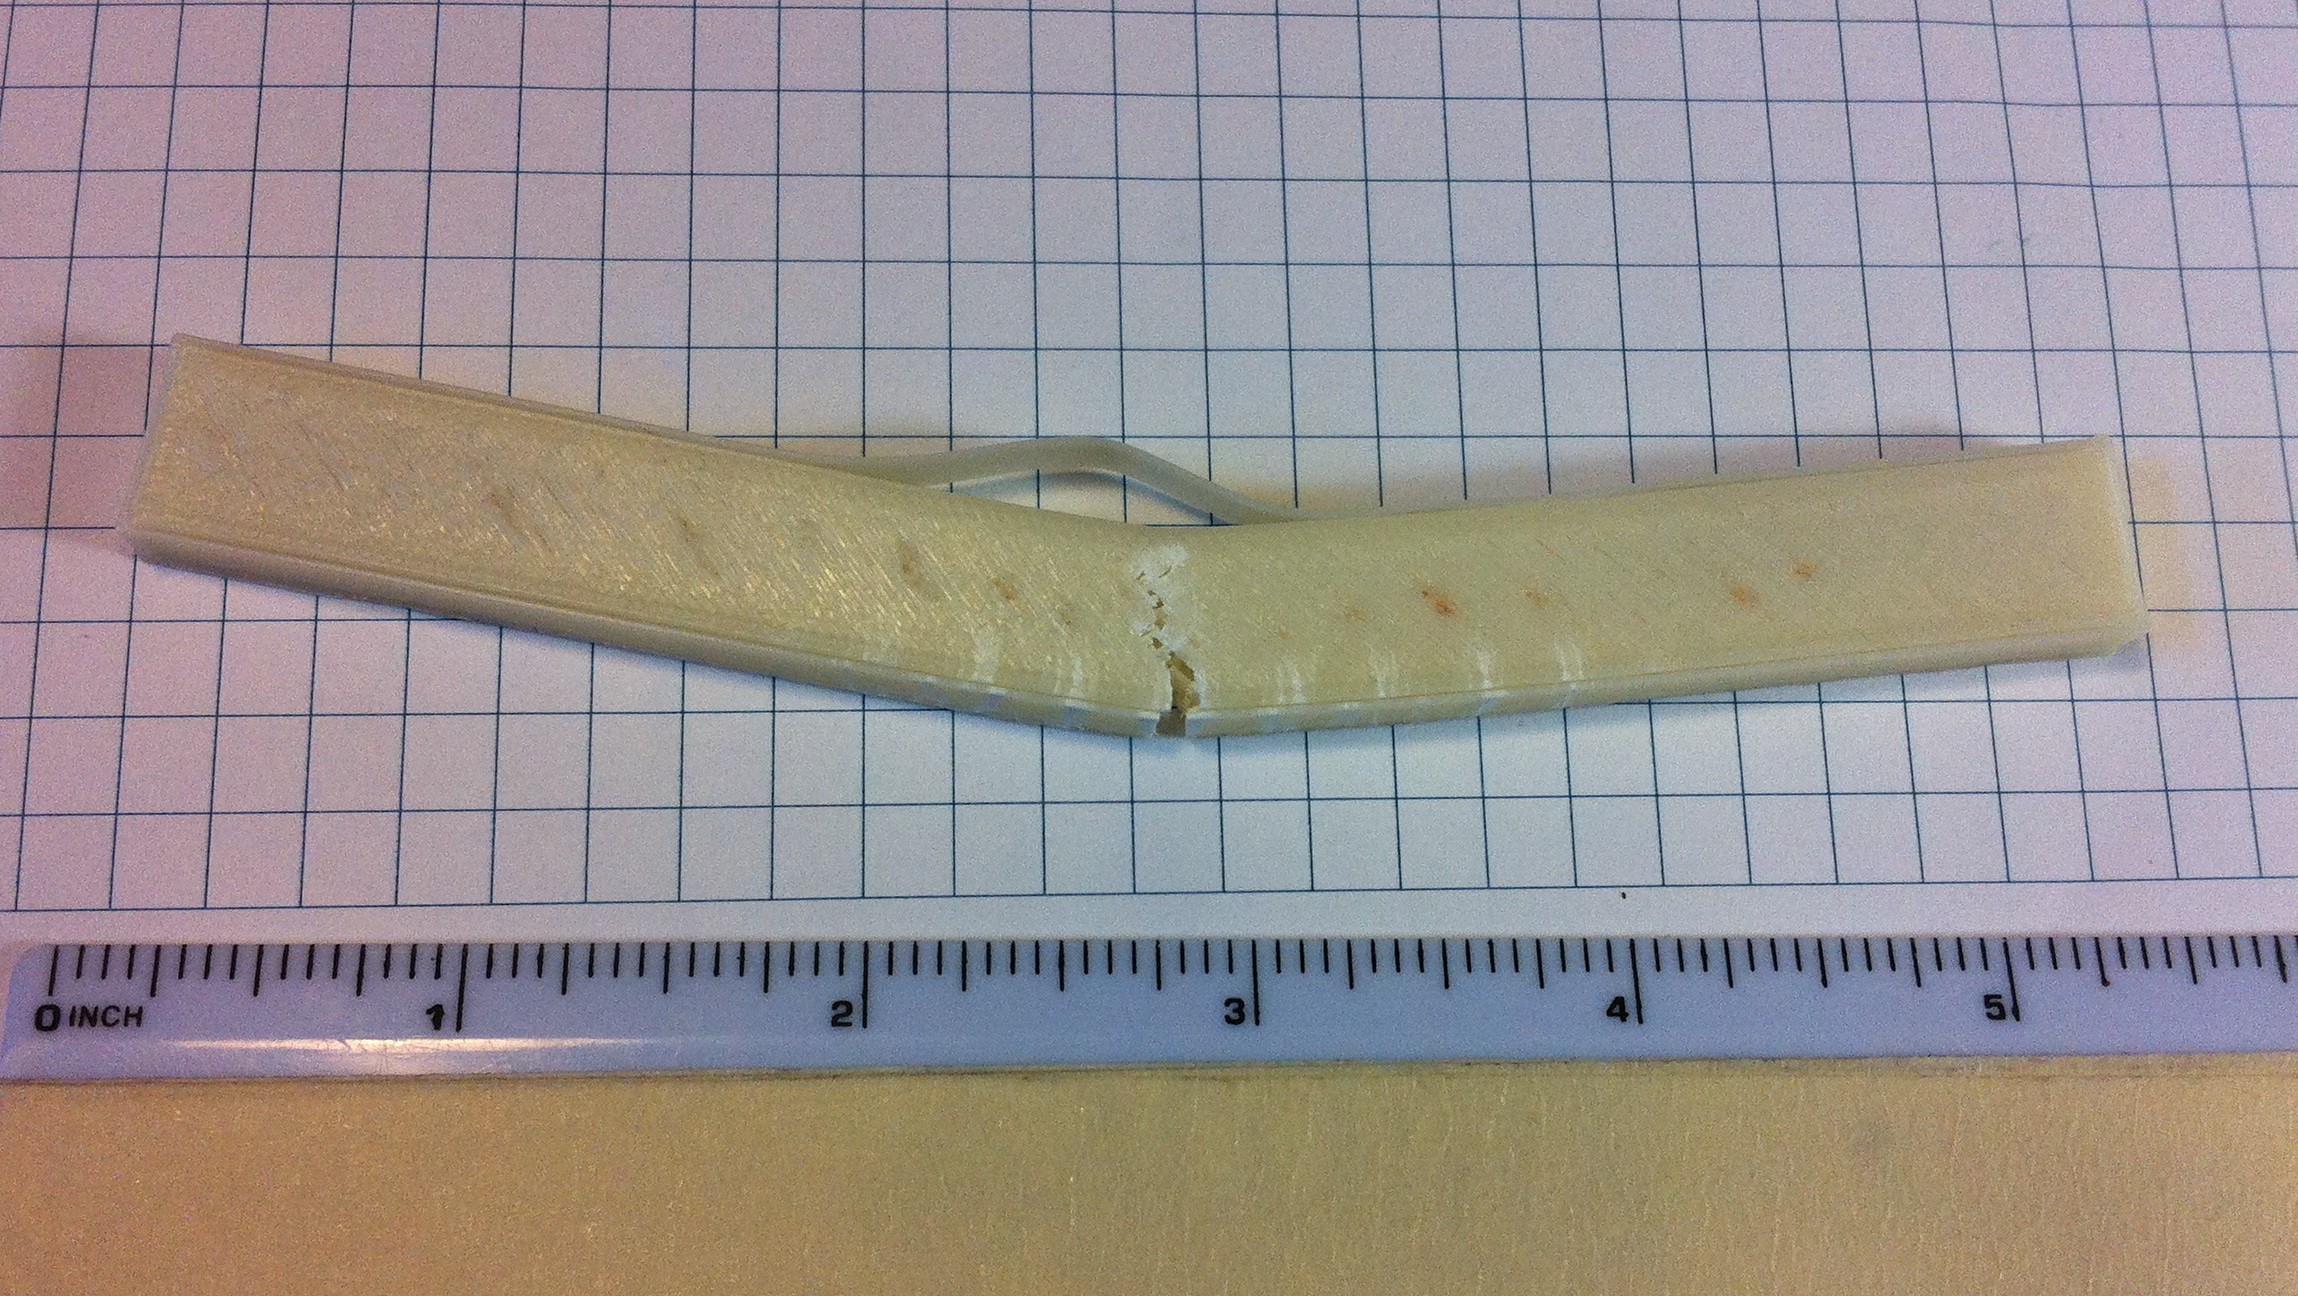
[…] for fun I used my new microscope and Testrbot to make a video showing the whitened areas appear in real […]
LikeLike
[…] of my projects this summer has been analyzing the mechanical properties of 3D printed parts using a homemade testing machine. I’ve been trying to figure out how to optimize the printer settings to maximize the physical […]
LikeLike
Dog!, Great site and projects. Very useful tool. Stepper motor ID’d in Testrbot BOM is not available and no known arrival … http://amzn.to/2nGGqOd …
Do you have a recommended alternative?
Thanks!
LikeLike
HI Steve glad you like my work & thanks for the heads up! This stepper motor would be a drop in replacement. https://amzn.to/2rbTMBq
LikeLike
Thanks again!. I appreciate you continuing to provide coverage on this. The “16X2 LCD Keypad Shield for Arduino Version B” is out of stock. The Arduino link now leads to “Elegoo EL-CB-001 UNO R3 Board ATmega328P ATMEGA16U2 with USB Cable for Arduino” which I was planning on ordering. What would be a good 16 x 2 shield for this Arduino?
LikeLike
This one is exactly the same here. https://www.sparkfun.com/products/13293
LikeLike
great congratulation bro , i m working on the same idea i m ginna make a fatigue testing machine i have some difficults about data quisition ,arduino and load cell c
ontrol if you can send me some files i m gonna be thankfull
LikeLike
All the documents and files are provided in the instructables.com linked in this article.
LikeLike